Installing a curtain rod may look like a small home improvement task, but getting it right can make a big difference to the overall appearance of your curtains. A properly installed rod keeps curtains straight, allows them to open and close smoothly, and gives your windows a more polished look.
If you are planning to install curtains yourself, this guide will show you how to install a curtain rod from measuring the window to hanging the finished curtains.
What You Need to Install a Curtain Rod
Before starting, prepare all the tools and materials you will need. Having everything ready makes the installation much easier.
You will generally need:
- Curtain rod and brackets
- Measuring tape
- Pencil
- Spirit level
- Drill
- Screws
- Suitable wall plugs or anchors
- Screwdriver
- Ladder or step stool if required
Make sure the screws and wall anchors are suitable for your wall type. Concrete, brick, and gypsum walls may require different fixing methods.
Step 1: Measure Your Window
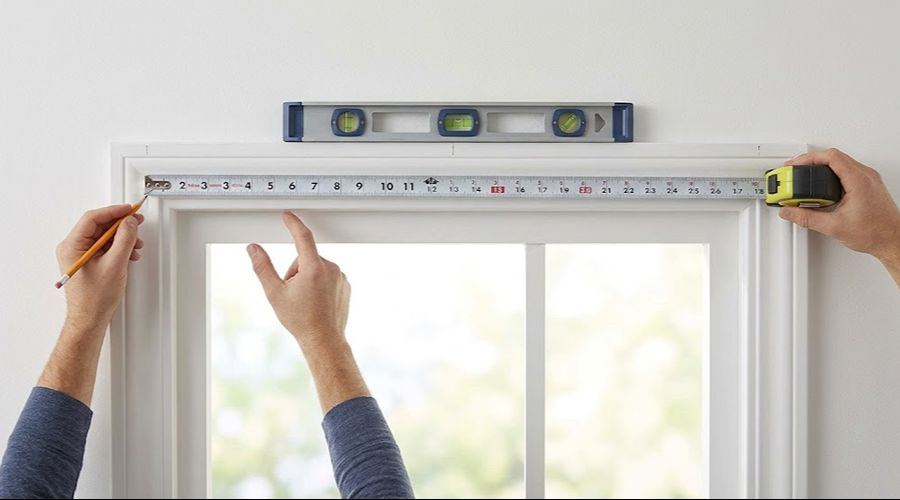
The first step is to measure the width of your window. Measure from one side of the window frame to the other and decide how far you want the curtain rod to extend beyond the window.
As a general rule, allowing the rod to extend around 15–30 cm beyond each side of the window gives the curtains enough space to open without covering too much of the glass.
Also consider the curtain width and weight before choosing the rod. Heavy blackout curtains, for example, may require a stronger rod and additional support brackets.
Step 2: Decide Where to Place the Curtain Rod
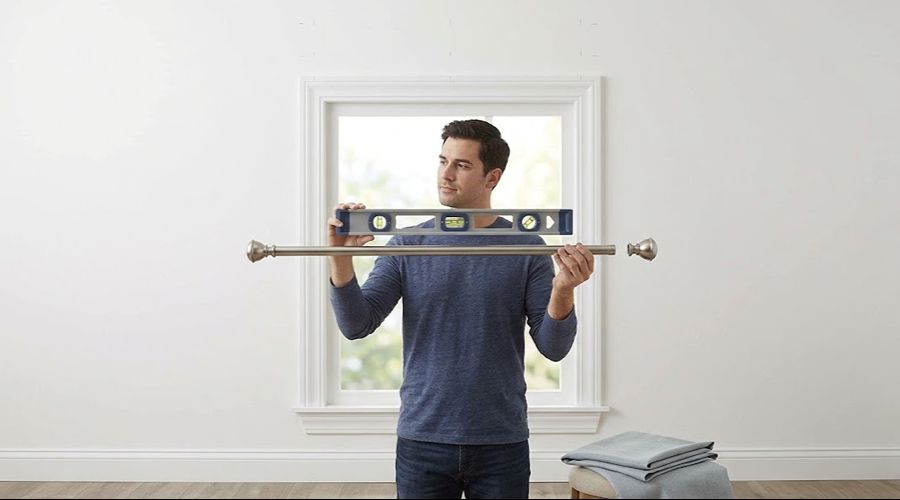
The position of the rod affects the appearance of the entire window. Installing it slightly above the window frame can make the ceiling look higher and the window appear larger.
For a traditional installation, position the rod several inches above the window. If you have high ceilings, you can install the rod higher to create a more elegant appearance.
Before marking anything, hold the rod in position and check how the curtains will look when hanging.
Step 3: Mark the Bracket Positions
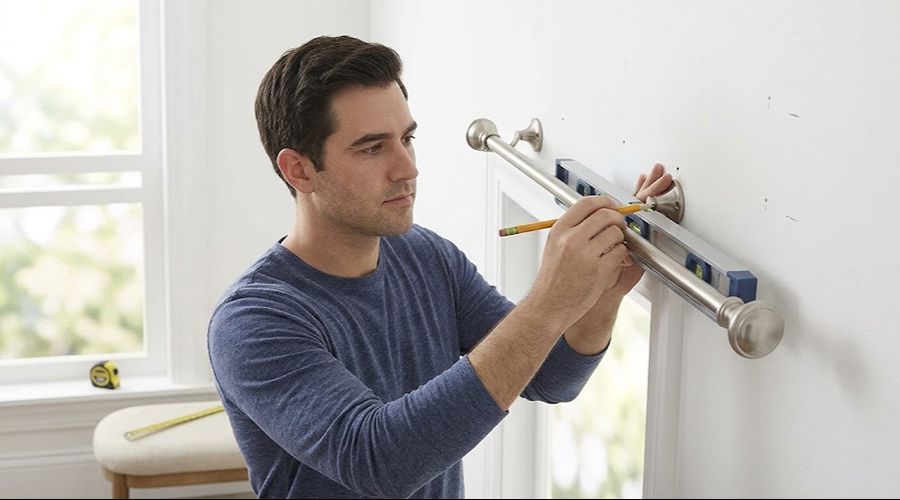
Once you have decided on the height, mark the locations for the brackets with a pencil.
Use a measuring tape to make sure both sides are positioned evenly. Then use a spirit level to check that the marks are perfectly straight.
This step is important because even a small difference in height can make the curtain rod look crooked.
For wider windows or heavier curtains, you may need a center support bracket to prevent the rod from bending over time.
Step 4: Drill the Holes
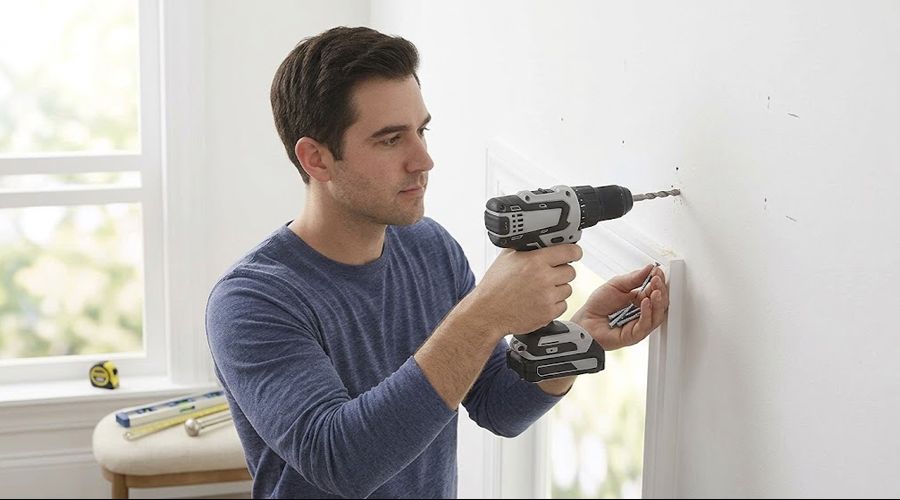
Now carefully drill holes where you made your marks.
The type of drill bit you use depends on your wall. Concrete and masonry walls normally require masonry drill bits, while other surfaces may need different bits.
Avoid making the holes unnecessarily large. The wall plug should fit securely inside the hole so the bracket remains firmly attached.
If you are unsure about the wall construction, it is better to check before drilling.
Step 5: Install the Brackets

Insert the appropriate wall plugs and secure the brackets using screws. Tighten them properly, but avoid overtightening because this can damage the wall or fixing.
After installing the brackets, check them again with a spirit level. Make sure they are secure and aligned before placing the rod.
This is particularly important when installing heavy curtains, such as blackout or thermal curtains.
Step 6: Place the Curtain Rod
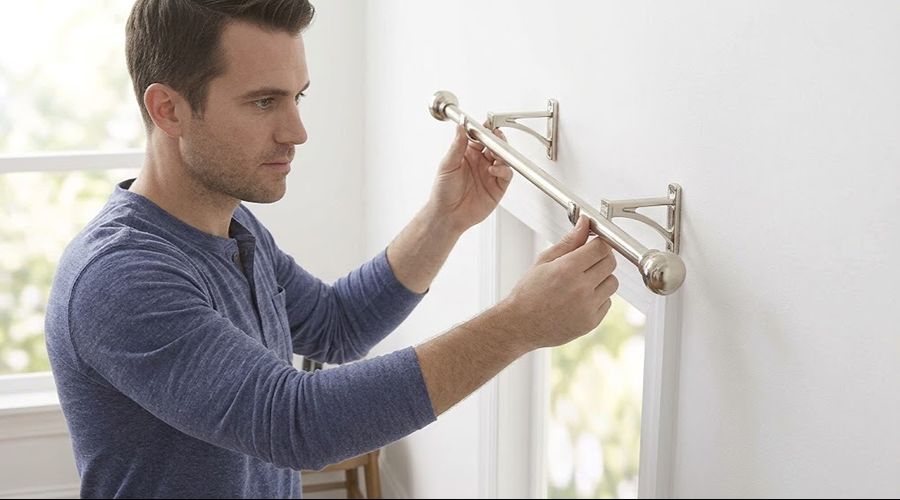
Once the brackets are firmly fixed, place the curtain rod into position.
Depending on the style of the rod, you may need to attach decorative finials or tighten small fixing screws to keep the rod secure.
Before hanging the curtains, gently test the rod to make sure it does not move or loosen.
Step 7: Hang Your Curtains
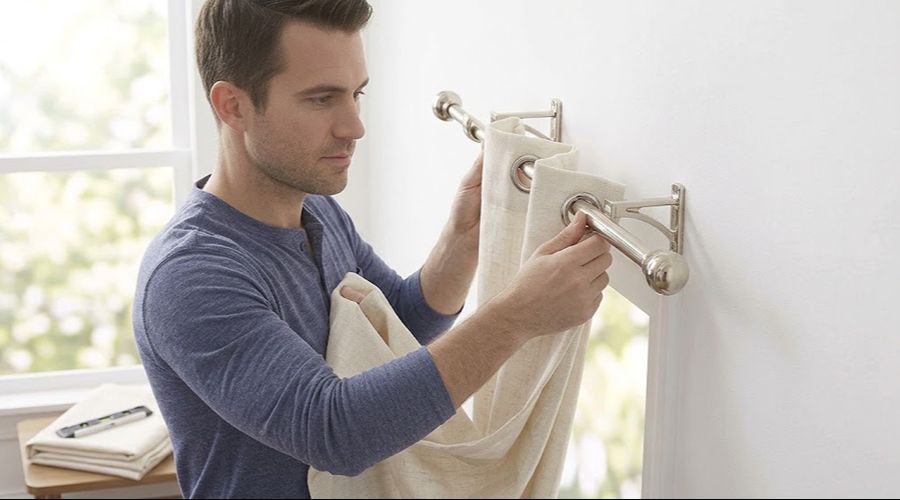
Finally, attach your curtains to the rod using the appropriate rings, hooks, eyelets, or curtain loops.
Spread the curtains evenly across the window and check that they hang straight. Open and close them several times to make sure they move smoothly.
If the curtains feel too heavy for the rod or the brackets move when you operate them, additional support may be needed.
Common Curtain Rod Installation Mistakes to Avoid
When learning how to install a curtain rod, a few common mistakes are worth avoiding.
Installing the rod too close to the window can make the curtains look cramped. Using unsuitable wall anchors can also cause the brackets to become loose, especially with heavy curtains.
Another common mistake is failing to check the level before drilling. Always measure twice and drill once.
You should also consider the curtain fabric and weight before choosing the rod. Lightweight curtains and heavy blackout curtains do not always require the same type of hardware.
When Should You Hire a Professional?
DIY curtain rod installation can work well for simple windows, but professional installation may be a better option for large windows, heavy curtains, high ceilings, gypsum walls, bay windows, or motorized curtain systems.
Professional curtain installation in Abu Dhabi can also help ensure accurate measurements, secure fixing, and a clean finish without unnecessary damage to your walls.
If you are installing several curtains throughout your home, getting professional help can save time and ensure every curtain is aligned correctly.
Final Thoughts
Learning how to install a curtain rod is relatively simple when you have the right tools and take accurate measurements. The key is to choose the correct position, use suitable wall fixings, keep the brackets level, and make sure the rod can safely support the curtain weight.
For simple installations, you can complete the job yourself. However, for large, heavy, or specialized curtains, professional installation can provide a more secure and attractive result.
Professional Curtain Installation in Abu Dhabi
For a neat and secure finish, Curtain Abu Dhabi offers custom curtains and blinds with professional installation. From blackout and sheer curtains to motorized and office solutions, our team handles measuring, fitting, and installation. We also provide free measurement and estimation for homes and offices, making your curtain installation simple and hassle-free.